Onboarding Guide
Welcome to the Persona 3 Dual team! This guide will get you set up and oriented regardless of your role.
Team Application & Approval
Section titled “Team Application & Approval”You need to apply & be approved to officaly join the team. Apply for the team HERE
Team Rules
Section titled “Team Rules”All team members need to read the team rules document HERE
Join the GitHub & Google Drive
Section titled “Join the GitHub & Google Drive”We use GitHub to track tasks and coordinate across all teams. Everyone on the project needs to join the GitHub. We use Google Drive to save large files and other assorted documents. The Team Google Drive is optional.
Steps:
- Apply for the team & ensure you’ve put your GitHub (& optionally your Google Email address) in the application form
Once accepted into the team, you’ll have access to the GitHub Organization, Project Board, and editing access to the Team Google Drive
Using the Project Board
Section titled “Using the Project Board”The project board is how we track progress across all teams.
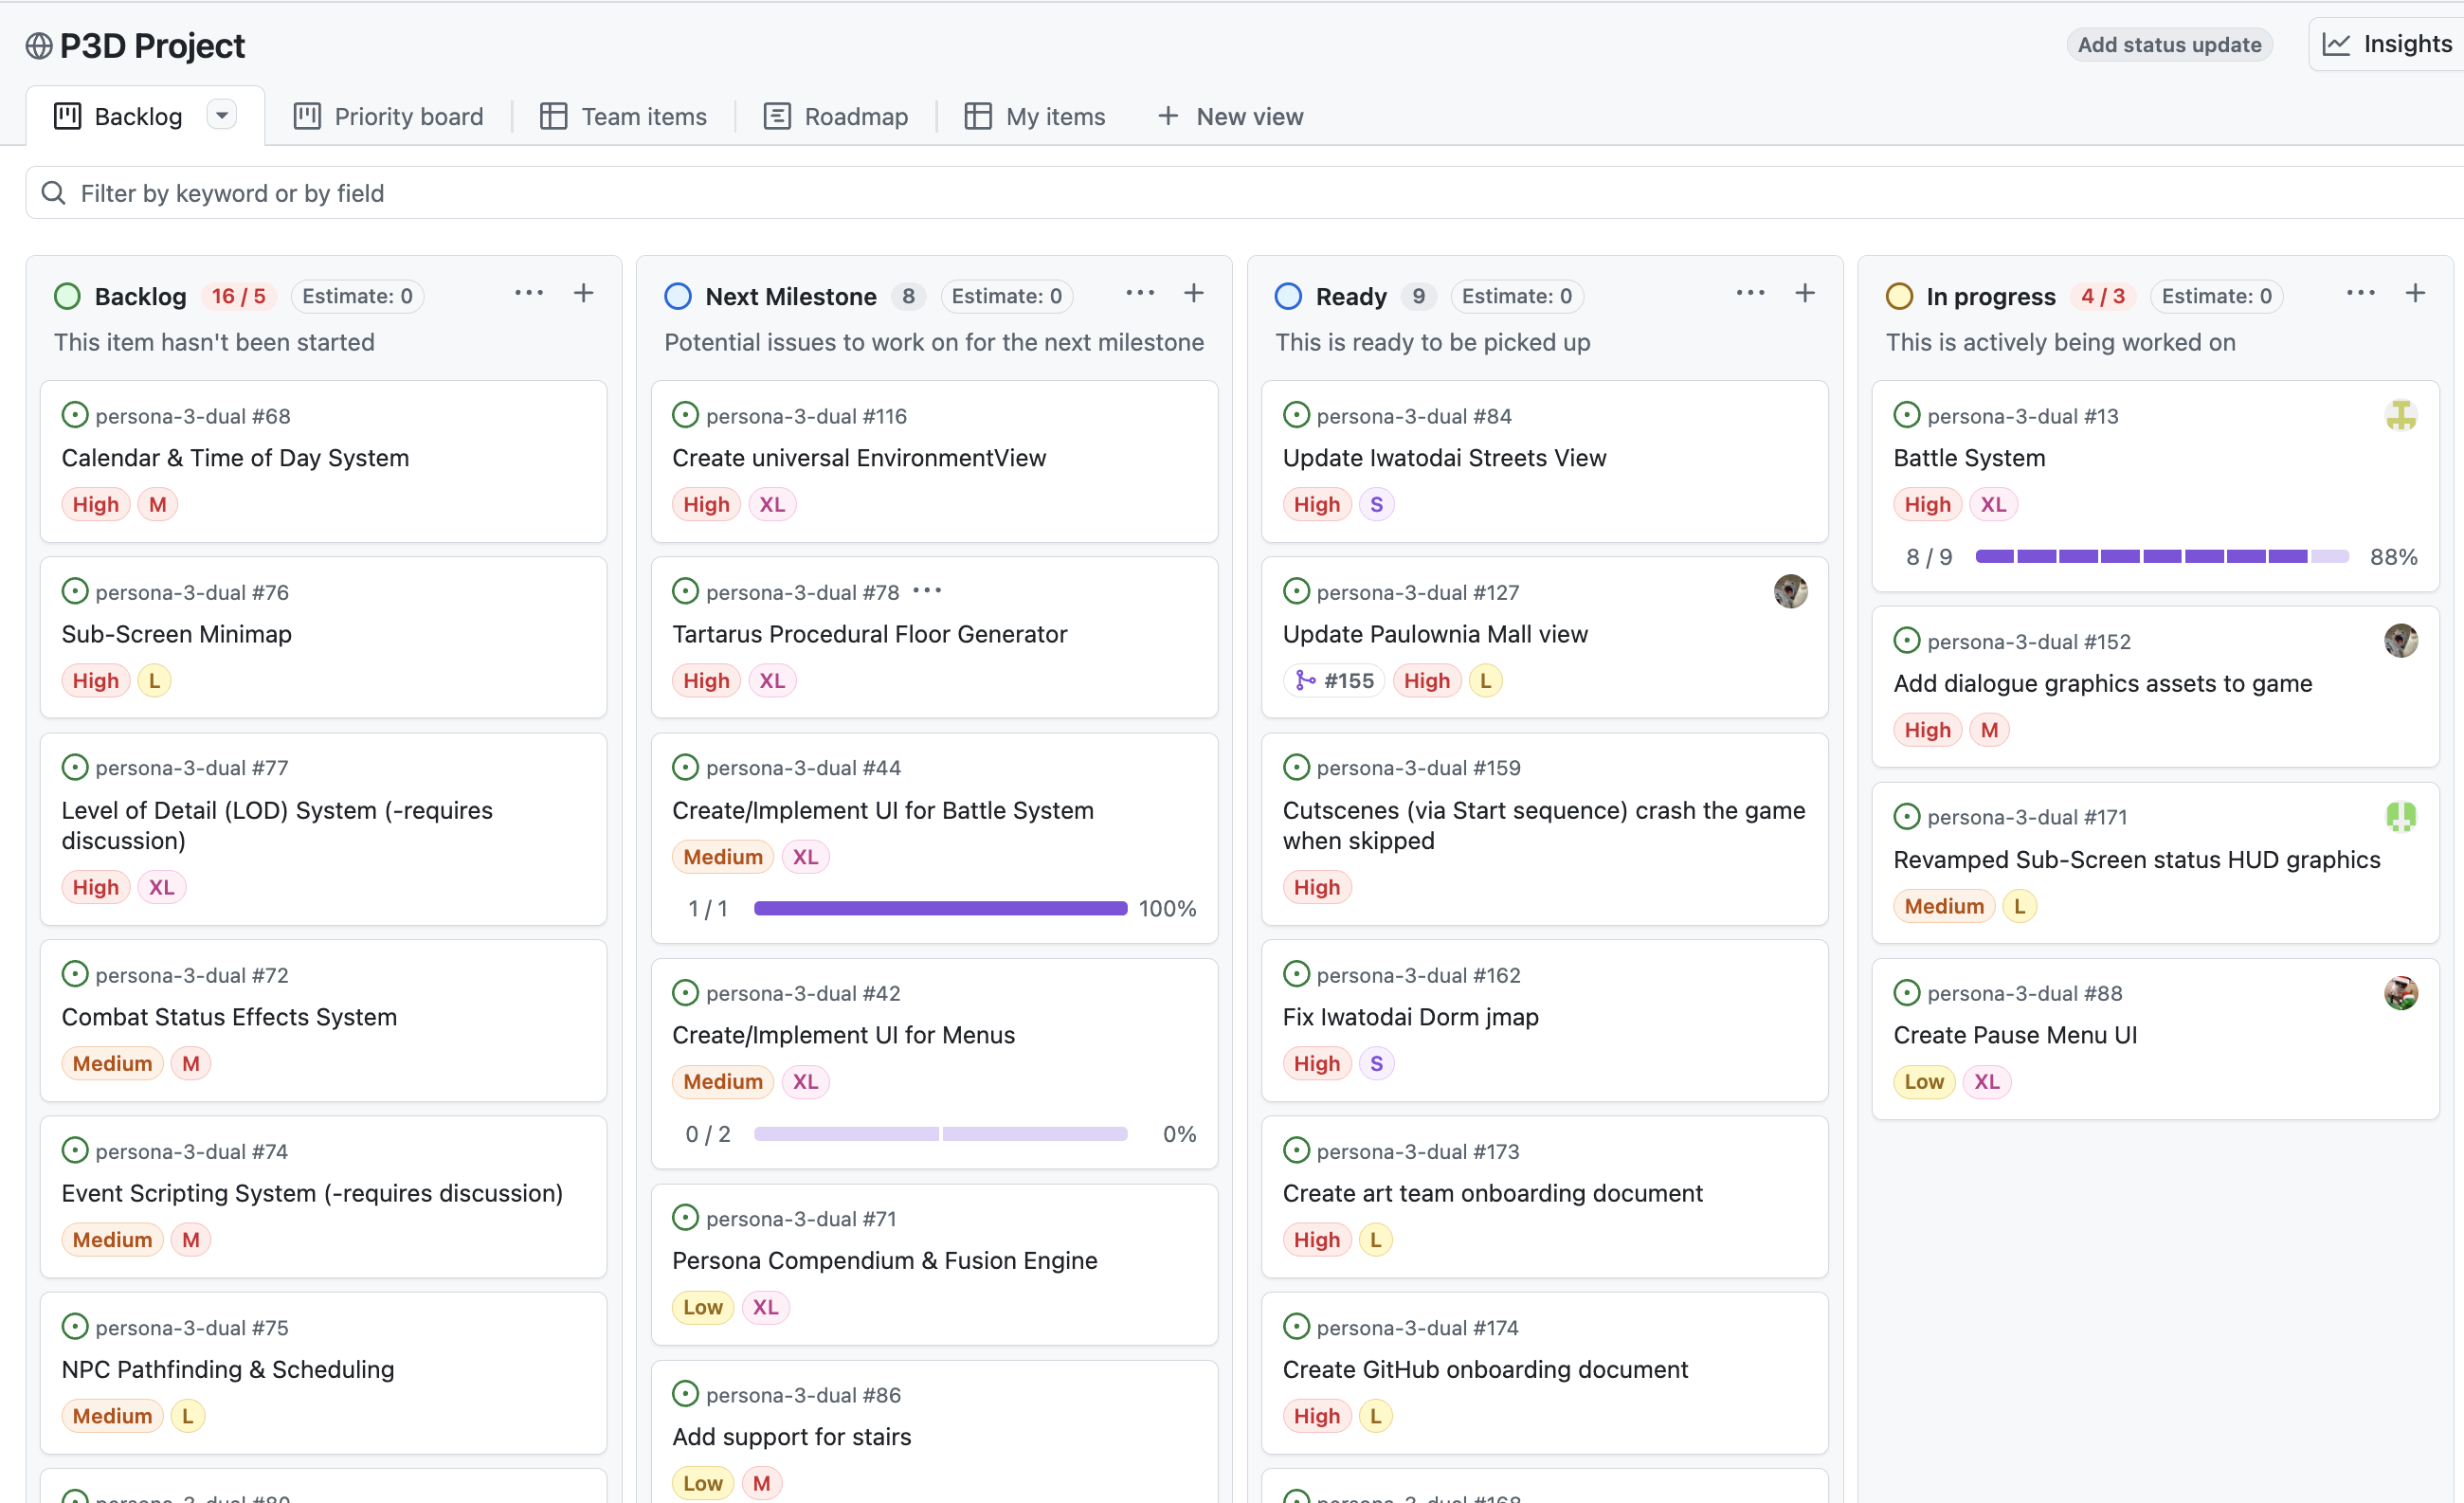
Columns:
| Column | Meaning |
|---|---|
| New | New issue, needs to be reviewed & approved by team leads |
| Backlog | Not yet started, no current priority |
| Next Milestone | Targeted for the upcoming milestone |
| Ready | Current milestone, ready to be picked up |
| In Progress | Actively being worked on |
| In Review | Submitted, awaiting review |
| Done | Completed |
| Suspended/Blocked | Paused, not actively exploring at the moment |
Guidelines: If you are working on a task (which must have an associated GitHub issue), you must:
- Drag your issue to In Progress when you start, and Done when finished.
- Assign yourself to any issue you’re working on.
- Comment regularly on your issue to keep the team updated on progress.
- No comment = we don’t know whats going on, and the task will be unassigned from you
- You can filter by label (e.g.
graphics,bug,development,polish) or milestone.
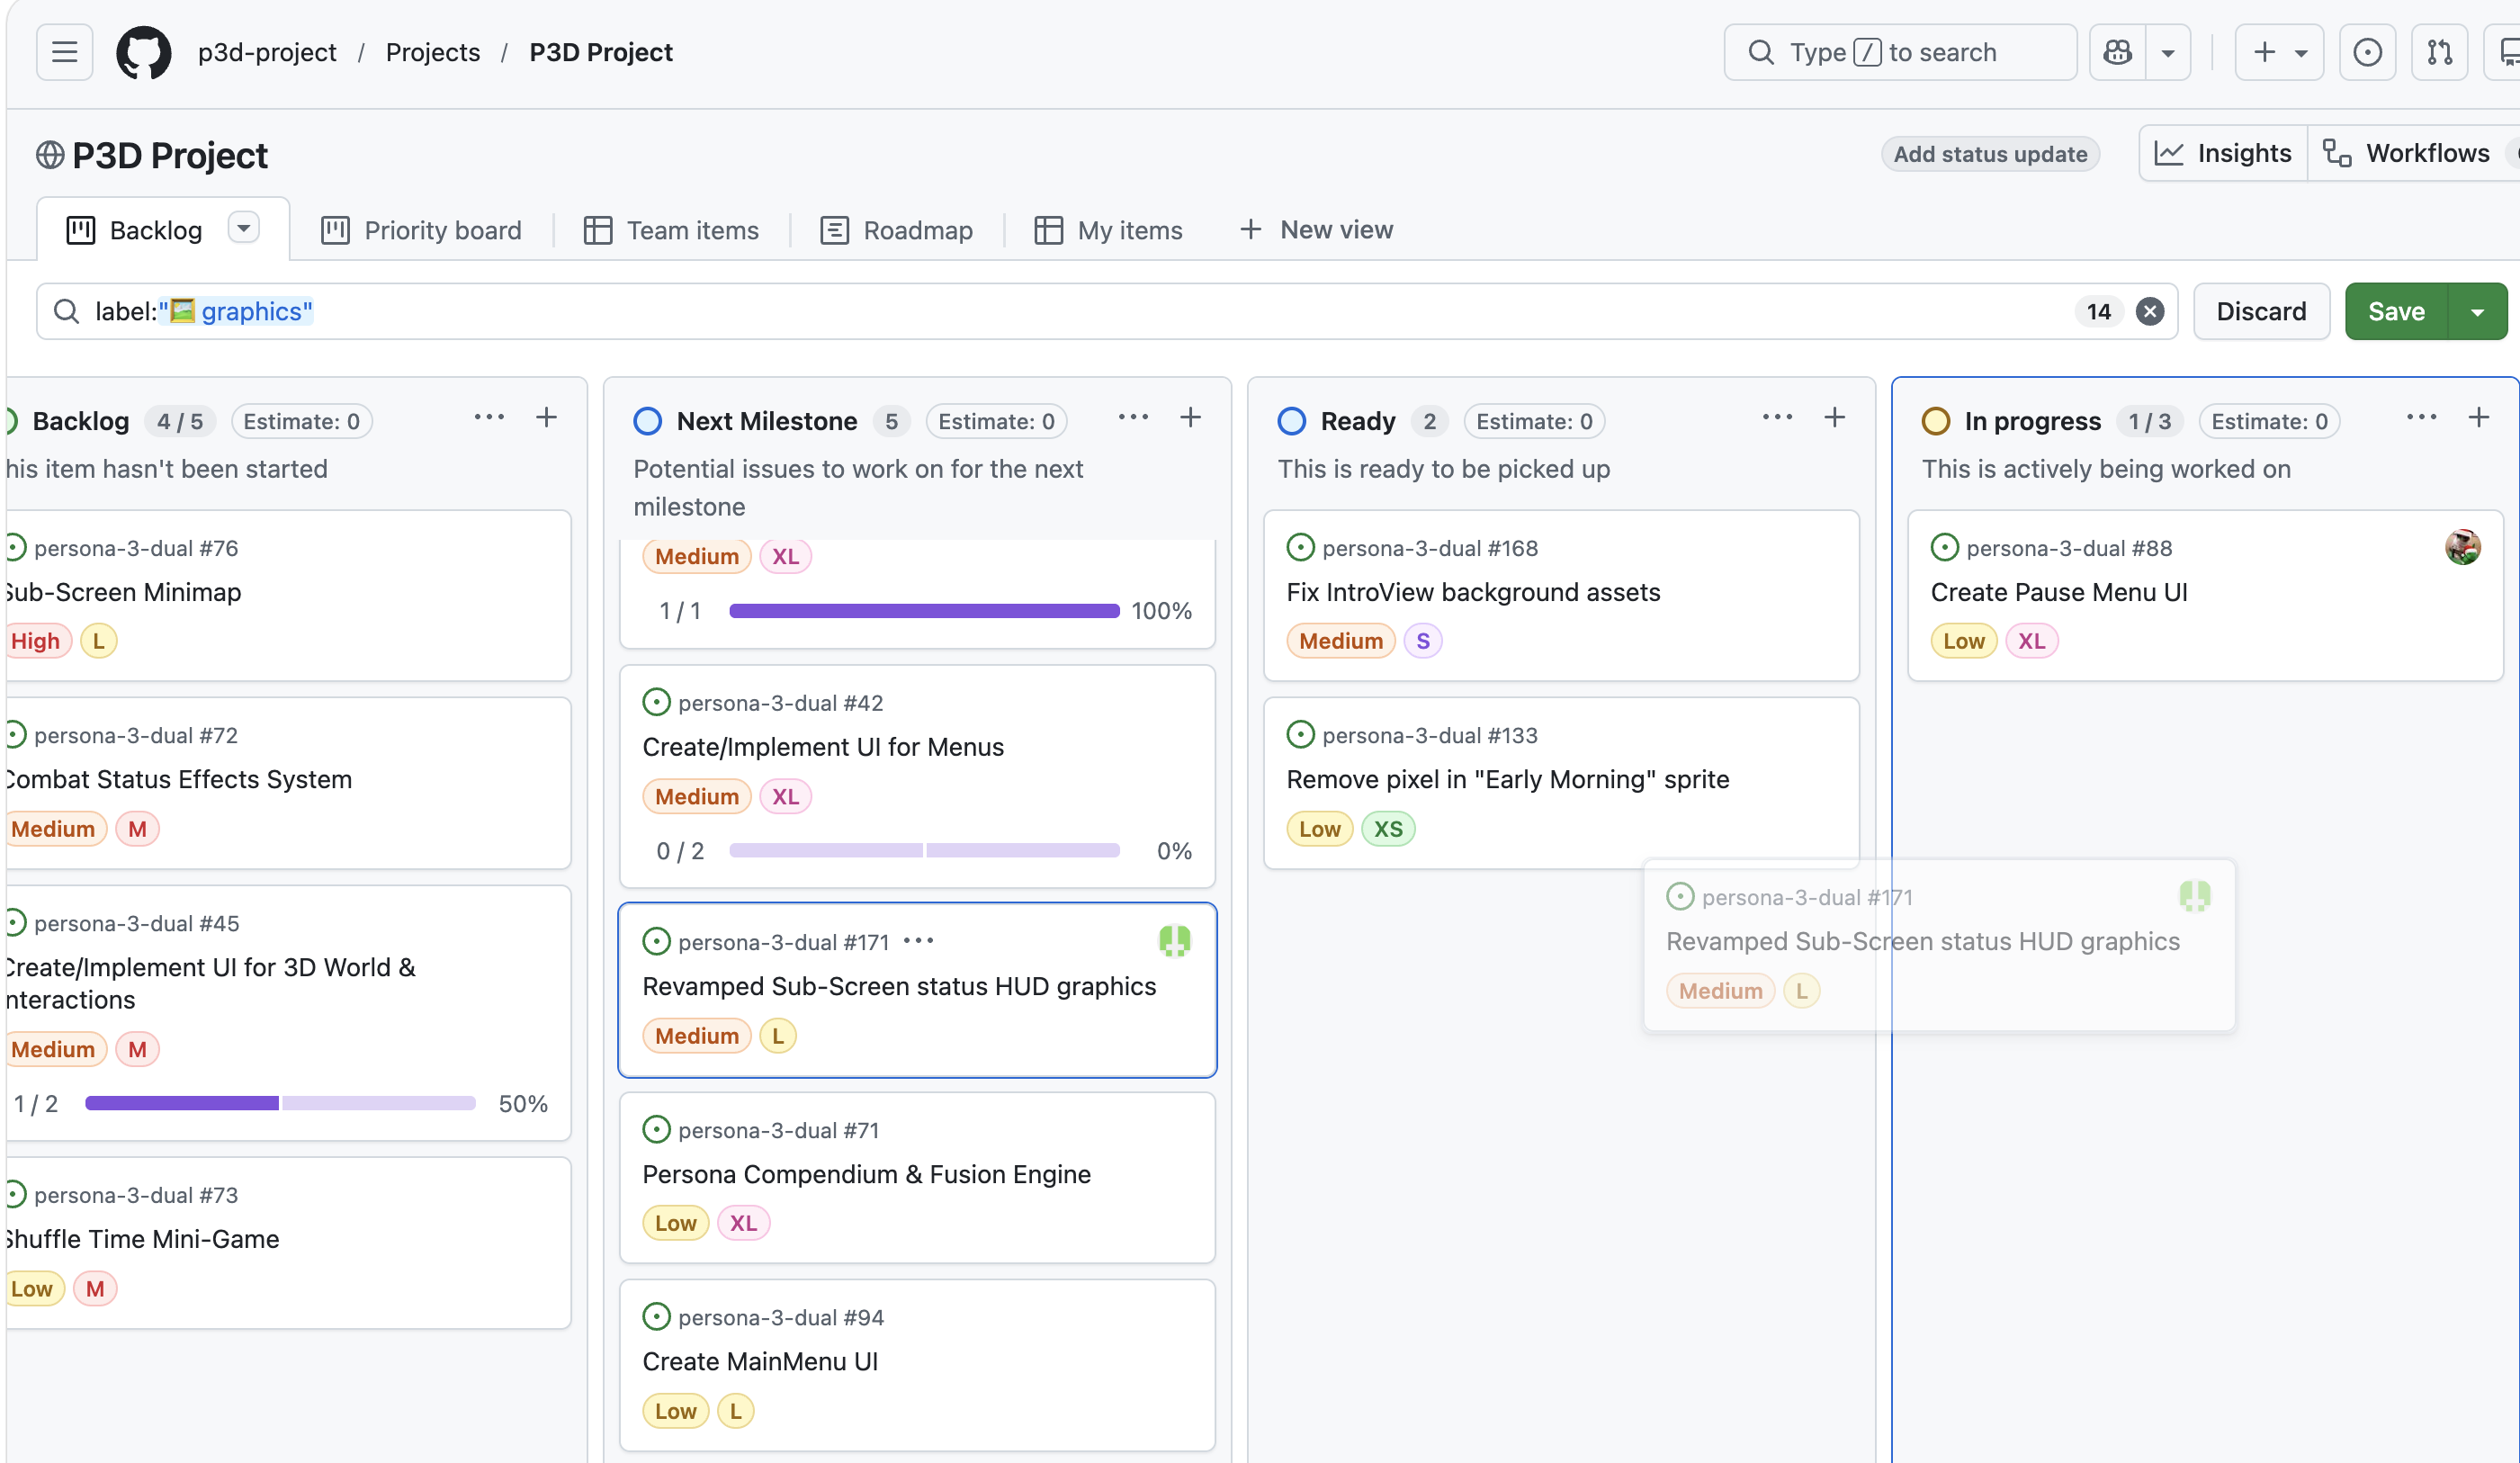
Creating a New Issue
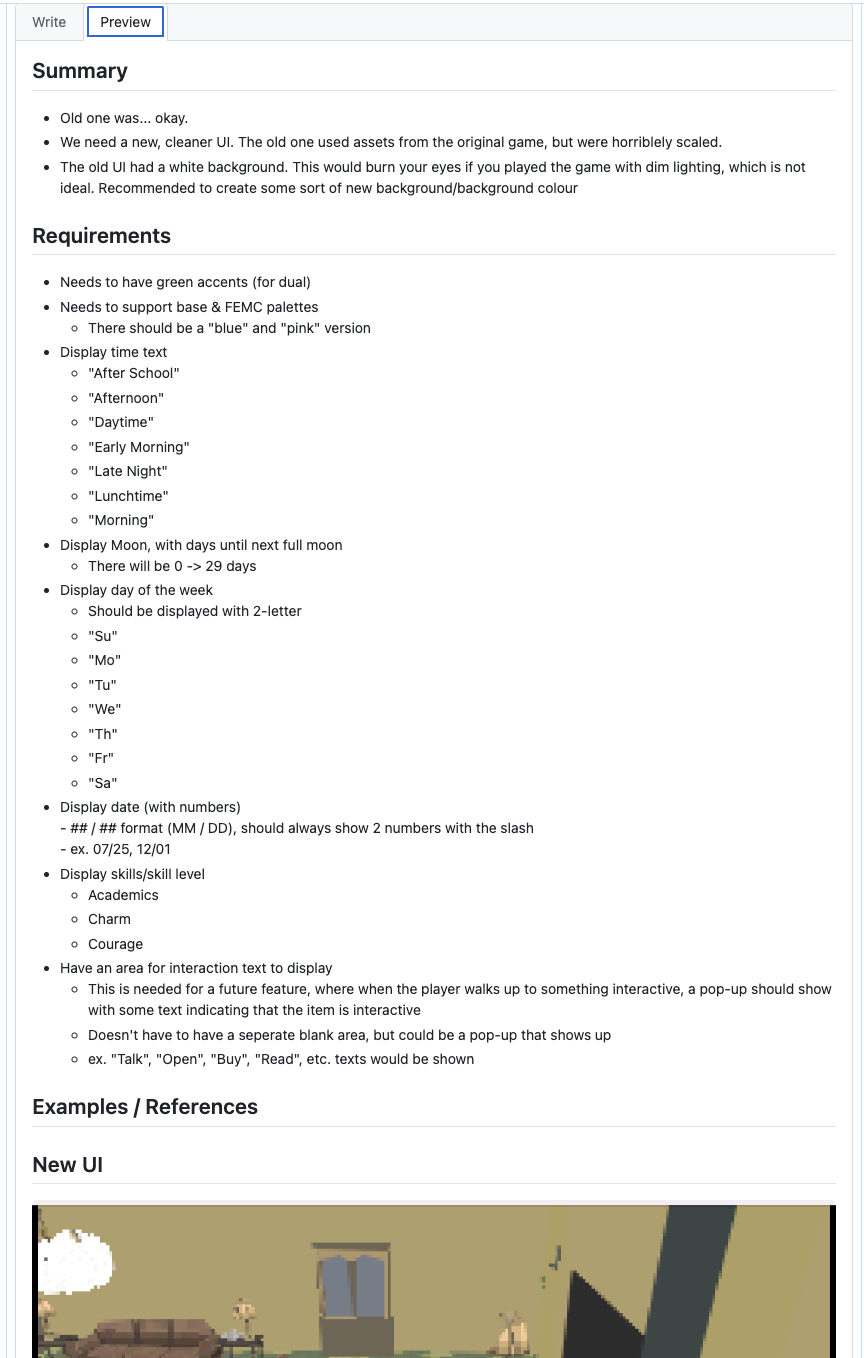
Section titled “Creating a New Issue”Want to add a new issue? Please use the Bug report or Feature request templates & add it to the New column on the project board. Once the associated team lead sees the issue & agrees, they will move it out of New.
- Ensure that you select the correct repo. Don’t know what repo to select? Select the (default)
p3d-project/persona-3-dualrepo. - We put new issues under New for a few reasons. It alerts the team leads of new issues; We can ensure the quality of the issue; We can ensure that there isn’t a duplicate issue.
Game Dev Team Setup
Section titled “Game Dev Team Setup”https://github.com/p3d-project/persona-3-dual
As an overall rule, the team avoids using external libraries as much as possible. We want to build everything ourselves.
The one notably exception is the Maxmod audio library
The team uses melonDS for testing, VS Code as the development IDE, & Docker as the development environment.
Prerequisites
Section titled “Prerequisites”You need to have melonDS, VS Code, & Docker already installed on your system.
melonDS
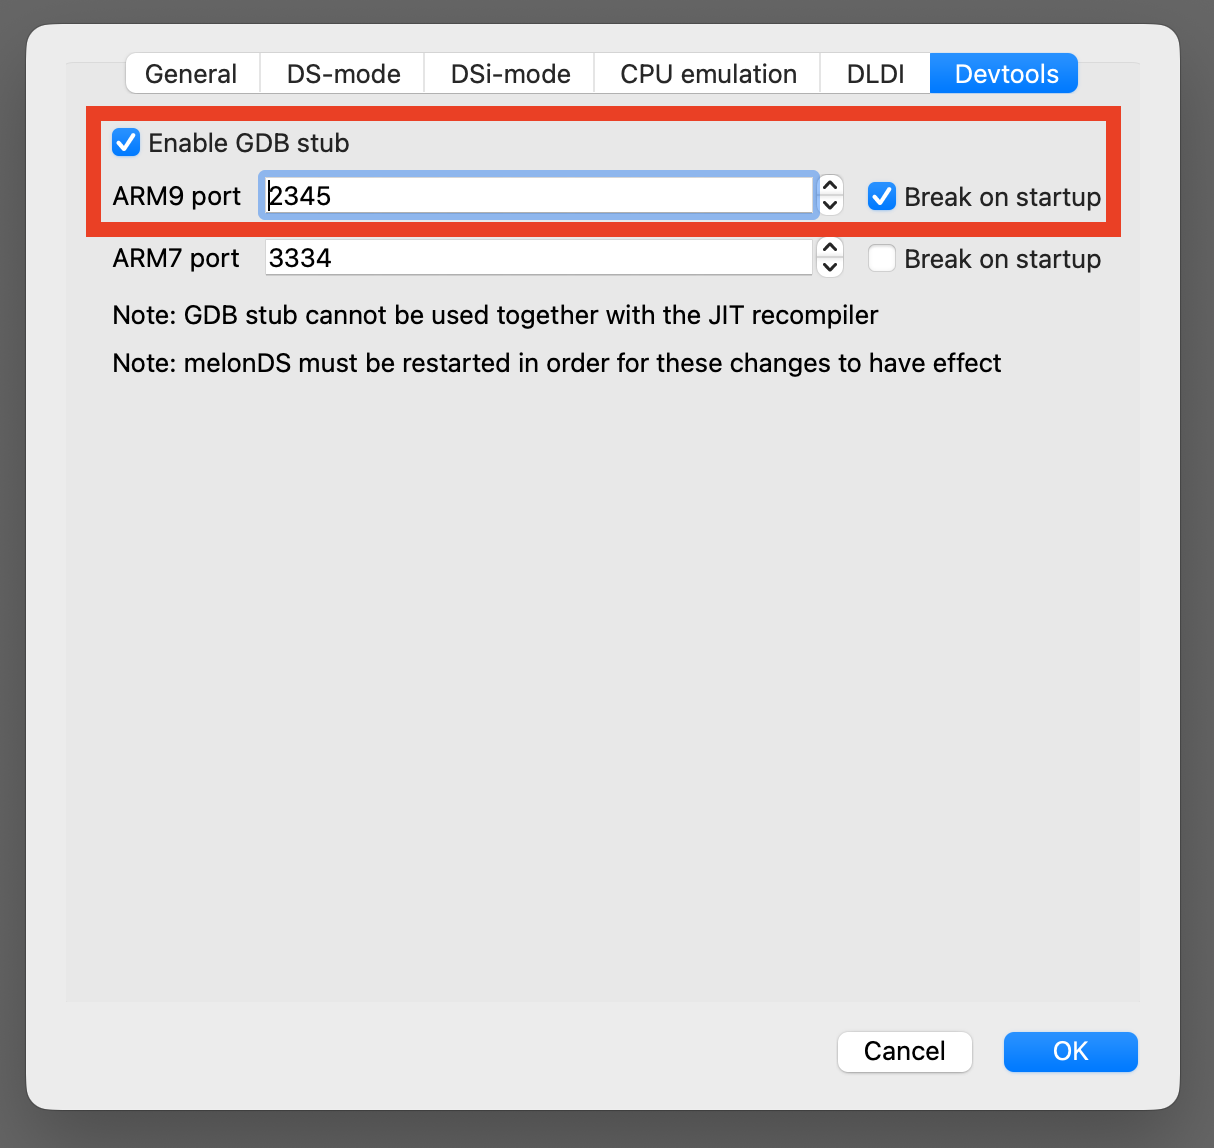
Section titled “melonDS”- Go to
Config → Emu settings → Devtools - Ensure
Enable GBD stubis checked - Ensure the ARM9 port is
2345&Break on startupis checked
When debugging, ensure that melonDS is already launched
VS Code
Section titled “VS Code”- Ensure that the
Dev Containersextension is installed
Docker
Section titled “Docker”- Ensure that Docker is launched & running
Docker needs to be running whenever you want to code
1. Clone the Repo
Section titled “1. Clone the Repo”git clone https://github.com/p3d-project/persona-3-dual.gitcd persona-3-dual2. Set Up Code Formatting
Section titled “2. Set Up Code Formatting”This project uses pre-commit to auto-format all source files before every commit. It handles C/C++ (clang-format), Python (black + ruff), and web files (prettier).
Install pre-commit:
# macOSbrew install pre-commit
# Windows / Linuxpip install pre-commit
Register the hooks:
pre-commit installThat’s it. Hooks run automatically every time you run git commit.
What happens during a commit:
The hooks reformat your staged files in-place. If any file is changed, the commit is aborted so you can review the diff. Just re-stage and commit again.
Run hooks manually (e.g. before opening a PR):
pre-commit run --all-filesWindows note: prettier requires Node.js. pre-commit downloads a local copy automatically the first time you run
pre-commit installorpre-commit run.
3. Open the repo in VS Code
Section titled “3. Open the repo in VS Code”Open the persona-3-dual repo in VS Code. Then, click the bottom left >< icon & select Reopen in Container
You may also see a notification on the bottom right to
Reopen in Container. This method also works!If this is your first time launching the container, it may take a few minutes for Docker to install the image. Otherwise, VS Code should re-launch within a few seconds.
You are now ready to code!
Debugging
Section titled “Debugging”Ensure melonDS is already launched & awaiting the debugger
- Build in debug mode (you can use the
make debugtask or just open a terminal inside the container and runmake DEBUG=1) - In VS Code, go to the
Run and Debugtab on the left panel, and select[Docker] (gdb) Connect to melonDS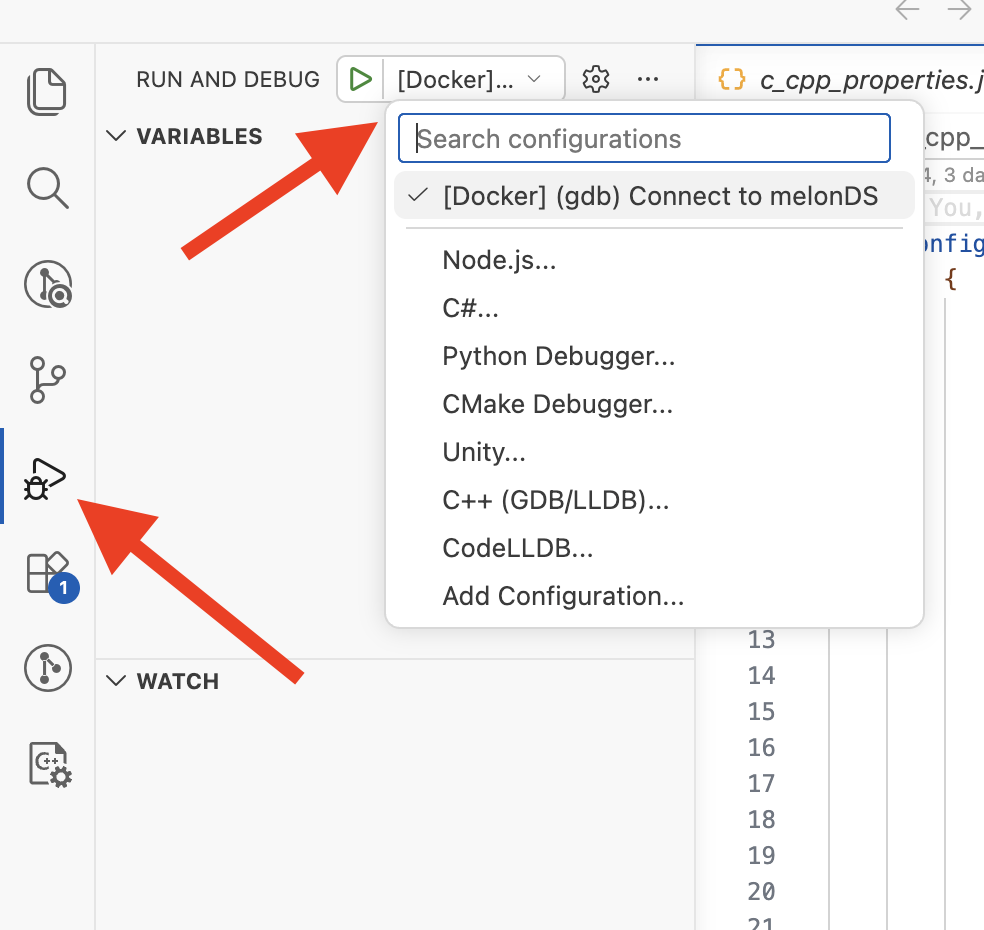
You are now ready to debug!
Web Dev Team Setup
Section titled “Web Dev Team Setup”https://github.com/p3d-project/p3d-website The website is an Astro project.
The team uses VS Code as the development IDE, & Node.js.
Prerequisites
Section titled “Prerequisites”You need to have Node.js, & VS Code already installed on your system.
1. Clone the Repo
Section titled “1. Clone the Repo”git clone https://github.com/p3d-project/p3d-website.gitcd p3d-website2 Install Dependencies
Section titled “2 Install Dependencies”npm install3. Run the site
Section titled “3. Run the site”Build for development
Section titled “Build for development”npm run devThe site will be available at http://localhost:4321 by default.
Build for production
Section titled “Build for production”npm run buildYou are now ready to code!
Graphics Team Setup
Section titled “Graphics Team Setup”Workflow
Section titled “Workflow”- Upload all completed assets and their editable source files to the Team Google Drive Graphics Folder.
- Track your work on the project board. Move issues through the columns as you progress.
- When uploading assets and closing an issue, leave a comment on the related issue with a link to the Drive folder, and upload viewable images to the issue.
UX/UI Team Setup
Section titled “UX/UI Team Setup”Workflow
Section titled “Workflow”- Upload all completed assets and their editable source files to the Team Google Drive UX/UI Folder.
- Track your work on the project board. Move issues through the columns as you progress.
- When uploading assets and closing an issue, leave a comment on the related issue with a link to the Drive folder, and upload viewable images to the issue.
3D Team Setup
Section titled “3D Team Setup”Workflow
Section titled “Workflow”- Upload all completed assets and their editable source files to the Team Google Drive 3D Folder.
- Track your work on the project board. Move issues through the columns as you progress.
- When uploading assets and closing an issue, leave a comment on the related issue with a link to the Drive folder, and upload viewable images to the issue.
Music Team Setup
Section titled “Music Team Setup”Workflow
Section titled “Workflow”- Upload all completed assets and their editable source files to the Team Google Drive Music Folder.
- Track your work on the project board. Move issues through the columns as you progress.
- When uploading assets and closing an issue, leave a comment on the related issue with a link to the Drive folder, and upload viewable images to the issue.
Video Team Setup
Section titled “Video Team Setup”Workflow
Section titled “Workflow”- Upload all completed assets and their editable source files to the Team Google Drive Video Folder.
- Track your work on the project board. Move issues through the columns as you progress.
- When uploading assets and closing an issue, leave a comment on the related issue with a link to the Drive folder, and upload viewable images to the issue.
Questions? Reach out on Discord.